All About That Brass
It looks like brass is back in – bright, shiny, golden brass. The last few jobs we have done featured plenty of brass, and they have been for customers who I would say are “in the know” for design trends. The styles are less decorative than previous iterations, but I am surprised by how quick it is back. It seems like just yesterday we were taking out everything that resembled brass and replacing it with oil-rubbed bronze. I guess there are only so many choices, and brass isn’t a bad one.
A great example of the brass trend roaring back are a couple sets of cabinets we have done lately which featured brass, not only in the hardware choices, but also added to the cabinets. We have previously done a set in black and just recently a set in walnut. The brass inlay is a fancy touch which isn’t too hard to pull off, but there are a few tricks which we figured out through a bit of trial and error.
The first set of doors and drawer fronts set we did were made from mdf with the grooves routed on the cnc router. We used 1/8″ thick brass and super glued them in the grooves after we chiseled the corners square. It worked well, but we planned to sand the entire panel in the wide-belt sander and that’s where things went a little sideways. Even with the lightest and quickest of passes, the brass would get hot and expand and then pop out of the grooves. We were able to finish up by hand, using a block backer behind the sandpaper, but the process took quite awhile. Luckily, we were only doing a handful of doors. In case you are wondering, the orbital sander was a no-go because the brass and mdf sand at different rates and the orbital sander would leave the brass high and the mdf low, resulting in a non-flat surface. The only way to ensure a flat surface is with very even amounts of sanding through the wide-belt sander or with a stiff backer behind the sandpaper.

On our most recent set of walnut cabinets, I decided to step up the brass to 1/4″ x 1/4″ and it made a huge difference. We were able to put the panels through the wide-belt sander (still taking light passes) and have that be our almost finished surface. We then very, very lightly sanded with the orbital sander just to get the brass surface finished consistently, but had no issues with the brass wanting to pop out of the grooves. The structural difference between 1/8″ thick and 1/4″ thick brass and its ability to dissipate heat, both added to the success. I think it also helped to have more glue surface on the side of the brass to keep them in place.

The walnut panels were a bit easier to finish than the black set because the entire panel was only clear coated for the finish. The black set required us to tape off the brass before painting black and then clear coating the entire panel. To get a perfectly flat finish, the black set also took a few extra coats of finish with 320 sanding in between to level out the surface.
Besides the brass hardware, brass is finding its way back in fixtures and accent pieces too. We found ourselves also working on a set of brass and walnut shelves to accompany the cabinets above. It seems like the brass is coming back and designers are not being shy about using it. Take a good look around the internet and you’ll find brass, and it will be as big as ever.

Old Orange Kitchen Cabinets Get Updated
We recently delivered a live-edge maple slab door to a customer and there was a lot of talk about making sure the maple wasn’t too yellow. She had her maple floors refinished as part of her house remodel and she was worried about the color of the new maple door. It wasn’t too much of an issue because the maple slab had an array of colors, including black epoxy, but when we were installing the door it became clear why she was worried about the color. Turns out she had a kitchen full of maple cabinets which had turned amber orange over the years and now clashed with the refinished maple floors.
I saw what she saw – bright white, newly and expertly refinished maple floors underneath old, crusty and orange maple cabinets. The cabinets were still in decent shape but they definitely needed some help to not look so old. She picked the right day to ask if there was anything that could be done about the color because I was riding high from a successful install of a very cool door and there was no way I was going to act like I couldn’t do it.
I wasn’t sure exactly how I was going to go about it, but I knew it would start with sanding. And, since everything in the kitchen, including the crown moulding was made from maple-veneered panels with an mdf core, I spent a lot of time very carefully sanding. After I had my parts sanded to an even and much lighter color, I started to apply the Raw Sealer finish from Basic Coatings. I chose this finish for one main reason, and that is because it is the exact same finish the flooring company used. I could have used another water-based finish with a white additive, but I figured why fight it? Use what they used on the floor and I should have the best chance of matching it.
The Raw Sealer has a very small amount of white added to it and I found that I wasn’t getting enough white in the finish until I was up to about six coats on my test pieces, so I decided to add some more white. I added enough white latex paint (about two tablespoons per quart) until the finish was the right amount of white in two or three coats instead of six. The white paint added brightness and covered the yellow orange of the maple, and it will work to retain the original color since the paint won’t yellow. It worked like a white wash for the cabinets and really did the trick.
The most difficult part of the job, besides the tedious sanding, was applying the finish with the white added. It needed to be applied evenly, so I needed to make sure my gun was working great and so was I. There were a few times where the color didn’t look too even or the gun sprayed a little wacky, but I was able to quickly wipe that panel off with a wet rag before the finish dried and reapply.
I spent a lot of hours on this job (more than budgeted, of course), but I think it came out great and I might even be convinced to do it again someday in the distant future. Click on the video link to see what I started with and how it all ended up.
Super Glue is Super in the Woodshop
Super Glue or cyanoacrylate glue or CA glue (whatever you choose to call it) is some amazing stuff. I have been using it more and more in the shop and seem to find new uses for it every day. When combined with an activator to make this already super glue that much more super, its crazy how fun and helpful it can be. Lately it seems like if something is broken or just not quite right, I’m reaching for the super glue. And, in an age of immediate gratification, it seems to fit right in.

A kit like this from FastCap is a great place to start.

Plenty of companies, like this one from Mohawk, offer kits that include different viscosities and activators.

The Stick Fast line, available at Rockler, offers many choices, including activators.

Titebond’s Instant Bond is available at Woodcraft and features a full line of viscosities and activators.

Brands like Loctite are commonly available at many hardware stores and perform just as well, though their activators will not be as easy to find.
CA glue, which most everyone knows as super glue, has recently developed quite the following, leading to a wide variety of choices in makers and products. The biggest expansion in product lines has come in the form of different viscosities, from thin to thick, which allow for greater control and the ability to be used in more situations. The thin derivation is great for making repairs where something is cracked but not really in two separate pieces and the thicker varieties are great for gap filling, while the medium is a good, all around, gluing choice.
The other advancement, the one which makes super glue super fun, is the addition of spray activators. An activator will make CA glue set up almost immediately, changing the clear, easily flowing liquid into a hard crystalline structure with great adhesive quality. The activator makes CA glue work the way you have always dreamed for glue to work – you have time to get the loose pieces into position and when they are, just shoot them with activator and there they stay. And, the repairs are incredibly strong.
My first introduction to CA glue in woodworking came in the form of a presentation at the St. Louis Woodworkers Guild. The speaker was discussing building intricate handrails, which were made of many small pieces of wood, connected end grain to end grain, to form the curvy bits at the top and bottom of the stairs. He showed how he was able to use nothing but CA glue in the tightest of spots to produce quick, strong and lasting bonds.
End grain joints are notoriously horrible glue joints in any other world, but in the super glue world the joints held up great. He brought in some samples and glued them right in front of our eyes and in just seconds formed a new piece of wood which no one could break. All he did was put the CA glue on one part and sprayed the other with activator. As soon as the two pieces touched, the bond was complete. On joints which required some open time for alignment, he also had the option to use only the CA glue and not shoot the activator until everything was lined up. The glue closest to the surface would dry immediately to hold everything in place and in a short amount of time the glue on the inside of the joint would harden for a complete bond. It is a real game changer in spots which are traditionally very difficult to connect.
Besides simply holding two things together, CA glue also has many other uses. I commonly use it when I am in the final stages of finishing and find voids which need to be filled. If the voids are big, epoxy is usually the choice, but CA glue works great as a type of clear filler between the epoxy and the final finish stages. I typically use the medium or thick variety and hit it with the activator for a speedy surface fill and repair. Once the CA glue sets up it can be sanded and worked like any other plastic finish and then topcoated without issue.
CA glue is also great as a wood hardener. It isn’t uncommon for me to run into wood that is decayed or starting to decay somewhere (especially in spalted or “character” wood) and needs a little support structurally. By soaking the questionable wood with the thin version of CA glue, I can quickly turn a delicate spot into a spot which is as hard as rock and will stay bonded with the surrounding wood. And, again, it happens almost immediately, even without an activator.
Lastly, CA glue can be a finish all by itself. I don’t personally use it as a finish, since I am not a wood turner (you can find out why by clicking here), but I know plenty of people who do. Usually, it is used for smaller projects like pens and bowls, where less-than-perfect wood is a common choice. I suspect it was first used to simply hold burled wood together and then people started to realize that it filled voids and finished nicely. After that, it was a logical step to start using it as the finish and take advantage of its strength and immediacy.
The big negative for me, when I started using super glue on a regular basis, was the possibility of accidentally glueing myself or getting glued to something else. I think everyone knows that super glue bonds immediately to skin and it seems like everyone is always warning everyone else to not get it on their skin, so I used it with trepidation. However, since using CA glue now, almost every day, I can tell you that it is much less scary.
I have no problem or concerns with using my raw, ungloved finger to wipe up a drip of super glue like I would any other errant liquid. If you do the same, you just need to be smart about it. If you get it on your hand, don’t immediately grab something – it will stick. Just let it dry and you will have no problem. And, if you do stick your fingers together, don’t freak out. Enjoy the moment and look at your fingers in awe and appreciate how good the glue works on your skin. Then, simply wipe the glue with acetone and you will be unstuck. And, even if you get CA glue on your skin and do nothing about it, the glue will start to peel off after a couple of days without causing any pain or damage. It really isn’t as life changing as others might make it out to be. As a matter of fact, I even know a guy (not named here for professional courtesy) who shot CA glue directly in his eye, and though a bit uncomfortable, had no real issues arise from it.
I recommend having three viscosities (thin, medium and thick) of CA glue and a spray activator in your shop at all times, ready to go. Purchase it before you need it, then you will have it on hand when the need arises and you can take advantage of the speed it offers. I guarantee that once you start using CA glue in your shop, you will find a million uses for it too.
How Much Lacquer Thinner Should I Use?
Today, I was having a conversation with one of my customers about spraying a conversion varnish (Krystal, from M.L. Campbell) and the problems he was having with getting it to lay down nicely after it was sprayed. He said that he applied is wet enough to blend together and not be rough, but that he had a lot of orange peel in the finish. After discussing the possible causes of the orange peel it became obvious that he needed to add lacquer thinner to the mix, which he did not do.
This customer is new to spraying conversion varnish, which is a two-part mix that sets up and hardens chemically like epoxy, forming a super durable finish. The information on the can talked about the 10:1 ratio of finish to catalyst, but apparently didn’t mention a thing about thinning with lacquer thinner, so he used none. Even if it was mentioned, I assume that he was worried enough about getting the ratio correct (click here to learn how to easily get the proper mixing ratios) and not messing up the mix that he never imagined he could, or even that he should add lacquer thinner.
In this case, my customer was getting orange peel because the finish was too thick for his two-stage turbine. The kids at the finish distributor led him to believe that he shouldn’t need to add thinner, but they did not ask about the power of his spray equipment, assuming that he probably had a turbine strong enough to finely atomize the finish without thinning.

This Graco 2-quart pressure pot system I currently use is an older 2-stage model, but gives good results with proper thinning.
I continued to discuss the need to add thinner with my customer, and pointed out that a non-thinned finish requires more turbine power than he currently has. If he owned a 4-stage or 5-stage turbine, he could probably use the finish without thinner, but not with just a 2-stage. I speak from experience on this one, because my everyday gun is an older 2-stage model, and it requires at least a bit of thinning on almost everything I spray. I am okay with this apparent shortcoming because I am a proponent of applying multiple thin coats, as compared to fewer thick coats, which I believe are just inviting trouble.
As our conversation continued, he asked the million dollar question, “How much lacquer thinner do you add?” For me, the simple answer is, “Until it sprays good,” which is very ambiguous I know, but true. I have an advantage because I have sprayed more than him and I have an idea where I am headed, but I don’t truly know until I shoot a sample board with it and see how things are flowing (which I do every time before I spray the real thing). I spray a sample piece of wood standing up vertically to make sure that I can get a fully wet and flat surface with no runs or sags and to get a feel for how fast I need to move the gun to make all of that happen. If the sample surface looks good, I move on and spray the real thing. If I have issues, it is usually because the finish is a bit thick, so I add lacquer thinner until the finish sprays smoothly without orange peel and without runs.

A viscosity cup like this Ford 4 style, available from Highland Woodworking is a good starting point.
Another, more technical way to determine the correct amount of thinner is to use a viscosity cup. A viscosity cup is shaped like a funnel and determines how thick a fluid is by the time it takes to empty the cup. A thin fluid will empty in just a couple of seconds, while a thick fluid might take 30 seconds or more. When I started spraying and used a viscosity cup, about 15 seconds was the right amount for my gun, but it will vary from gun to gun. When learning to spray, I recommend using a viscosity cup and to follow the manufacturers recommendations. If nothing else, this will give you a good starting point from which you can make later changes and have a way to achieve consistent results. After you spray for a while, there will be less mystery, and you will know from one test shot what needs to be adjusted, even without the viscosity cup.
When my customer asked about adding lacquer thinner, I know he was worried about possibly adding too much, and after thinking about it, I don’t know that you can add too much. I can follow the logic that adding too much thinner may change the chemistry, but I mix the 10:1 ratio of conversion varnish to catalyst first and then add the thinner, so there should still be the same amount of resin and catalyst, just with more space between them, in the form of lacquer thinner which will quickly evaporate and let the two parts do their thing. Even with other lacquer products, which includes sealers, nitrocellulose lacquers and modified lacquers, I can’t think of any time that I have ever had a problem because I added too much thinner.
I’m sure finish manufacturers would disagree and warn you to not be so cavalier about it, but I sure wouldn’t worry about adding too much thinner. Simply add enough thinner until your spray gun is able to apply a nice, even and wet film that flows out flat and dries without sagging. Even if you do mix it a bit thin, feel confident knowing that you can always compensate by moving more quickly or reducing the amount of fluid coming out of the tip of the gun.
You Need to be a Badass to Brush a Finish
Most woodworkers that I have met, try to finish their own projects, and while they may do great woodwork their finish often falls short and lets the world know that their project was not finished by a professional woodworker or finisher. The typical look of the less-than-perfect finish is one of obvious and often errant brush strokes. While I think it is possible that some of these finishing jobs are seen as perfectly acceptable by less discerning eyes, I would like to think that the applier of these lackluster finishes knows and sees that they could do better, but are at a loss for how to correct the problem.
My first solution, and always my first recommendation, is to purchase a high-quality spray gun and start spraying your finish. A spray gun is quick, capable of producing a flawless finish and may even make finishing fun. There are lots of reasons why you may not feel comfortable spraying a finish, but there are at least 492 reasons why you should spray your finish–the first 485 being that you need to be a badass to brush a good finish.
Brushing a good finish requires an amazing level of patience, attention to detail and a willingness to not cut corners. It can be done, but often the person that relegates themselves to brushing a finish is usually the same person that struggles to produce a good finish because they aren’t patient, aren’t paying close attention and are trying to do as little work as possible to call the job done. It is a crazy irony of a situation, but it happens all the time.
Now, first let me be clear, I don’t have a problem with brushing a finish. I think it is perfectly acceptable and sometimes required, but it has to be done right just to not look bad, never mind looking great. Luckily, there really are just a few tidbits to keep in mind that are the keys to a beautiful brushed finish.
Apply Thin Coats
You will be tempted, at all stages of finishing and throughout your entire life, to apply a finish that is thick and wet. Often this is under the misguided notion that thicker is better and it will speed things up, but nothing is further from the truth. A thick finish coat is the first and deadliest weapon in the unprofessional finishers arsenal. No matter how well you apply a thick coat of finish, it will somehow, somewhere on your woodworking be less than perfect and scream, “This dude doesn’t know what he is doing!”

This photo, kindly supplied by one of my customers, shows what happens when the paint is too thick. There are many sags and runs that appeared slowly as the paint was drying.
Thick finish coats show deeper, more obvious brush strokes because they are just that, deeper. Thicker coats also tend to run and, at very least, sag. And, the last thing, that shouldn’t be underestimated, is that thicker finish coats take much longer to dry, which allows more debris to get in your finish, lengthens the dry time between coats and often leads to blemishes from handling a piece before it is dry. There is, as far as I can tell, nothing to be gained by brushing on a finish in thick coats versus thinner coats.
Applying thinner coats can and should be thought of in two ways. The first is simply the amount of finish moved from your brush to the surface. When applying the finish, put on just enough material to cover the surface and nothing more – do not leave puddles. There should be so little on the surface that it is impossible for the finish to run or sag. The second way to think about thinner coats is in the viscosity or the thickness of the material itself. Thinner material will flow fast, like water and thicker material will flow slow, like syrup. Make sure your finish is not too thick by adding the proper solvent for your finish, like water, mineral spirits, alcohol or lacquer thinner if needed. Many finishes will be fine directly out of the can, but some thicker finishes will benefit from a little thinning. Be sure to read the can for proper thinning options and test your finish on a piece of scrap material first to see how it flows and lays down.
Pay Attention to Your Brush Strokes
No matter how well you apply a finish with a brush, brush strokes will most likely be visible at some point. The good news is that wood has a grain to it that can help hide the brush strokes. The secret is to apply the finish with brush strokes that follow the grain. Don’t go all willy nilly and just slop it on. This is where the patience and attention to detail really come into play and where you have to let your inner badass shine.
Plan out your brush strokes so there aren’t any unintentional stops or starts. Where parts meet make sure to stop and start where they stop and start. On mitered corners, start with the brush at a 45 degree angle so the brush marks only follow the grain of each board.
Lastly, make sure that your brush strokes follow the full length of the work. If a single piece of wood is 30′ long, your brush strokes should be 30′ long in a single uninterrupted and reasonably straight pass. It may sound a bit overboard, but that is what it takes to do this correctly.
Keep a Wet Edge
Working with a brush is not fast. While you are messing around with the application and focusing on your brush strokes, it is possible for some finishes (especially paints) to start to dry while you are applying them, requiring you to step up your game even more. It is important to keep a wet edge while you are working, so each new brush stroke blends with the previous one. If you move too slow and the finish has dried or started to dry, you will basically be applying two coats as opposed to only one. If you are finishing woodwork, this will cause the finish to have an unevenness about it, either because of a difference in the sheen or in the way it fills the wood pores.
When working large open areas, plan out your approach and move quickly. Do what you can to quickly get the finish on the surface and then focus on your brush strokes to finalize things. A small-nap roller can even be used to help speed up delivery to the surface before final brushing. If you have a choice, work in cooler temperatures (always out of the sun) and with reduced airflow to slow down the drying.
Work Horizontal
Any finish application, whether brushed or sprayed will benefit from being horizontal. Having your pieces flat on a work surface during finishing allows you to fully see what you are doing, especially with good reflected light and helps the finish to level out while drying. The other obvious benefit is that you should get no runs on a horizontal application unless you are extremely talented. You may find it worthwhile to completely finish your piece before assembly so you can keep all of your parts horizontal.
Choose the Right Brush
There is much to be said about brushes, but for me it comes down to one simple rule. Don’t ever use a cheap brush. Don’t even let them in your shop. If you have a cheap brush in your shop (you know, the one that you were only going to use for applying glue or something else non-technical), you will inevitably end up trying to use it for some sort of real finishing and it will not turn out well. I would argue that it is better to not finish at all than to try to finish with the only brush you could find in the shop which was purchased in a 10-pack at the dollar store. Using a good brush gives you at least a fighting chance. For those of you that want a bit more technical input, remember to use natural bristles only for oil-based finishes and synthetic bristles for either water-based or oil-based finishes. It all comes down to the fact that natural bristles don’t like to be soaked in water and synthetic bristles can be soaked in anything.
There you have it. Five simple little rules, all of which if you completely follow, still only give you about a 50% chance of producing a beautiful brushed finish. The other 50% is dependent entirely on your willingness to not take anything that resembles a shortcut and on you being a badass every step of the way.
Look at the Finish with Your Hands
Finishing wood has several benefits, with the main one being protection. Finished wood is protected from contaminants and other fluids (especially water) that could ruin the piece. Finishing wood also makes the piece look more beautiful than a raw piece of wood. It adds depth and brings out details that would be completely hidden otherwise. Finishing wood also makes a piece just seem, for lack of a better word, finished, like someone cares, like it is more valuable. A good finish is nice and smooth and begs to be touched. Reaching out and touching a finished piece of wood seems to be an instinctual way to determine the overall quality, like smelling your food before taking a big bite. I can tell you from lots of personal experiences that the first thing customers do when they see a newly finished piece of furniture is to reach out and touch the wood. They are using their eyes to look at it at the same time, but they are doing half of their looking with their hands. With that in mind, I would suggest that you do at least half of your looking with your hands when finishing a piece of wood.
Your hands can tell you so much about a surface that your eyes can’t. First of all, you can feel lots of places that you cannot see, whether it simply be hidden from view from a lack of light or from a lack of access or maybe just that it is in a bad position at the time. A great example of all of these is on chair work. A chair is meant to be seen from all angles and there are usually lots of intersecting surfaces headed in all directions, with many hidden from view.
Your hands can also feel things in plain sight that your eyes might never see. This is especially true for clear finish coats. If you don’t have big, obvious, light-reflecting mistakes in a well-lit shop, they may not show up enough to see – that is until after you deliver it to your customer and they put it right in front of their big bay window, the one that is similar to the bay window you don’t have in your shop.
I use my bare hands continually through the finishing process. Combined with a low, raking light to help highlight imperfections, they create a dragnet that catches anything trying to make its way into the finished pice. And, the best part is that my hands never miss, they feel everything (except color).
Get your hands involved early in the finishing process, even during rough sanding and surface preparation. During this phase your hands will let you know if there are any dents or chips that aren’t obvious enough to see, and they will give you an overall feel for the surface, how smooth it is and if there are any unflat areas that need to be straightened out. It will give you a good idea where you need to spend more time sanding and point out areas of raised grain that you could never see with your eyes alone.
After you have finished sanding, use your hands, while you are blowing off the surfaces with compressed air, to wipe the surfaces clean. Your hands will loosen particles that would otherwise stick and the air can blow them away. In lieu of tack clothes (which I don’t own anyway), I always use this method, just wiping my hand on my pants as I go. While you are cleaning the surface, without noticing it, you will also be looking at the surface with your hands. You will feel anything that wasn’t adequately sanded the first time, and have a chance to take care of it before you are in too deep.
Your hands are also fantastic for work in-between finish coats too. At this point, the surface and color should be in great shape and any issues should be small and almost undetectable, except with your hands. After scraping or sanding the first sealer coat, use your hands to help clean the surface for the following coat, just like you did before applying the first coat of sealer. While you are wiping off the dust (and wiping it on your pants), you will feel any dust nibs or rough patches or even runs while you are working. Your hands will tell you everything you need to know about the quality of your surface and how you are progressing.
I usually apply one or two more coats of finish, each of which requires less work, but every one involving my hands to make sure the surface is ready for the next step. In fact, I use my hands so much that I am pretty sure I could do my work in-between finish coats without even using my eyes (insert your own joke here, I teed it up for you).
The next time you are working on a finish, get your hands more involved. Try to use your hands as much as your eyes to recognize what is going on with the surface, even in places that are hidden from view. You will be amazed at how much you can “see” with your hands.
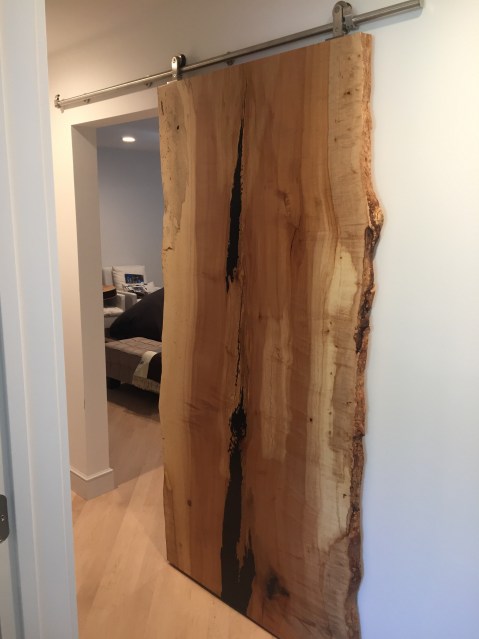
Siberian Elm Live Edge Slab Table Top #1
I have been cutting a lot of slabs lately and building a lot of tops. This is the first one that I have finished out of a big double-crotch Siberian elm that I milled in the spring. The top is 36″ at the narrowest and 58″ at the widest. The slab was milled 3″ thick and was flattened and finished with a hand-planed surface at 2″ thick.
For those of you that haven’t heard yet, Siberian elm is one of my favorites. The wood needs nothing added to it to make it beautiful – just a clear top coat (actually four coats of Klearvar) is all it takes. The wood for this top is a delicious medium brown with tons of visual interest, especially where the main trunk splits into three branches.
The wood slab and the steel base (built by Commercial Fabrication) are going to serve as a 42″ bar-height community table in my customers newly remodeled basement.

The first of several Siberian elm slabs to get finished.

A little bit of finish and a closer look shows the character of Siberian elm.

Siberian elm log being processed on the Lucas mill with slabbing attachment for logs up to 64″ wide.

Freshly milled Siberian elm slabs.
The Best Outdoor Wood Finish

Cetol Door & Window can be found under a new line name of ProLuxe by Sikkens. It retails for about $70 per gallon.
I often get asked, “What can I put on wood that will protect it outside?” My follow-up question is, “Do you want a finish that builds up to a film or just something that soaks in, like an oil?” If the answer is a film finish, I recommend Cetol Door & Window, from the Sikkens Proluxe line of wood finishes. It holds up better than any other outdoor finish that I have used, and every painter that I know and trust uses it too. I have found Cetol to last almost twice as long as the next class of film finishes.
In my teenage years, I tried regular ol’ Minwax polyurethane on the wood bed of my restored ’63 Chevy pickup truck, and I couldn’t believe how fast it started to peel. One St. Louis summer of constant heat and sun made it look like it had a bad sunburn with lots of dead skin.
After that, I moved on to other products like spar urethanes (Minwax also makes one of those, called Helmsman’s). Yes, it lasted longer, but not LONG. It started to look bad after a little more than a year. It didn’t totally fail all at once, but enough areas were falling apart that it didn’t really matter – it just looked bad.
In defense of these two products, the bed of a pickup truck is a tough environment. It gets direct sun, extra heat with no breeze, and the surface is horizontal, so water has a much better chance of nosing its way under the finish. It really gets no more demanding than this for a wood finish.
With yearly maintenance, the spar urethane could be kept looking reasonably good, but eventually the maintenance gave way to submission and the weather won. The boards still looked alright (nothing rotted through), but there were always spots where the finish failed and the beautiful clear-coated lumber had cracked finish and gray spots of raw wood.
It wasn’t until much later that I was introduced to the Sikkens brand name from a friend in the St. Louis Woodworkers Guild. He had great things to say about their products, and then I started noticing them being used by different painters on different jobs around town – and consistently. Nobody was using anything else, at least not anyone that I trusted, so I started using them.
Originally, Cetol only came in various forms with added stain. Some of the colors were pretty light, but none were clear. I believe the color is added to help with UV protection, but it does nothing to help color matching or achieving a clear finish. Now, with the name change to Proluxe, a colorless version is available, and it is the one that I use.
The can says that Cetol should be applied with a brush and not rolled or sprayed. I haven’t rolled it, but I have brushed and sprayed it, and both worked fine. Spraying is more difficult, and probably not recommended by the company, because the Cetol has a long working time and tends to sag if applied too liberally. That same working time is great for brushing and allows large areas to be worked and reworked to blend brush strokes. If you do try to spray it, start with a light application and allow it to settle for a second so you can get a feel for how it is going to sit down. Keeping a wet edge isn’t critical because it doesn’t even start to get tacky for a long time and the following passes will easily blend together. If you do spray the Cetol be vigilant about finding areas that start to sag or run and simply blend them in with a brush.
Cetol, like many other finishes, takes three coats to build a good protective barrier. A fourth coat will add a bit of extra protection, but isn’t required. I would opt to skip the fourth coat on the initial application and put that energy to a maintenance coat later down the road.
Regular maintenance is critical to keep the finish from failing. Keep an eye out for areas that start to crack and get another coat on as soon as they appear. If you wait too long it will be necessary to completely strip the finish and start over.
Cetol should last for several years without maintenance on vertical surfaces and even more if they are protected from the sun. Horizontal surfaces in the sun will probably last a maximum of two years before they require attention. Both of these time-span numbers are not great, but they are at least twice as long as the spar urethanes. If you jump around the internet and read about other choices or recommendations from other woodworkers, you won’t find anything that lasts longer.
Unfortunately, three years is really the maximum for an outdoor clear finish with sun exposure. Of course, if you know of a finish that lasts longer please let all of us know about it. But, do watch out because the world will beat a path to your (long-lasting, clear-coated wood) door.
American Elm Slab Really Takes a Shine
A few years ago I cut a huge American Elm log into slabs and quickly sold all of them except one piece that ended up being short after hitting a few nails. The nails dulled the sawmill too much to finish the cut, so I just cut the slab off at about five feet long and salvaged what I could. All of the other slabs where long enough to make large tables while this one struggled to find a home, until I got a request for a kitchen peninsula top.
I flattened the slab on the Lucas mill and sanded it by hand since it was too wide to fit through the wide belt sander. It wasn’t until I sprayed the first coat of finish on it that I realized how nice it was and was reminded why I like American elm so much.
The slab had a great shape with a beautiful crack down the middle and the edges had tons of character too with ridges and bumps down the entire length. But, what really made it stand out and grab your attention was the figure of the wood and its chatoyance, or the way the light bounces off of the surface. The finish has great depth and changes in brightness as you walk around the piece. It reminds me of satin sheets with ridges that reflect ribbons of light. It is really something that you need to see in person.
Here are some before and after photos of the slab.


How to Make Realistic Worm Holes in Wood
If you want to make something look older, just add some worm holes. Sounds simple enough, but there is a major difference between just poking holes in the wood and making the holes look authentic. Now that the all natural, rustic wood look is in style, even new, or at least not very old wood often benefits from more character, and I am here to show you how to really do it.
First off, let me assure you that I have a lot of experience in this field. I often build pieces that need to be “wormed up” in some regard, either to make new wood look old or to make old wood look even older. Especially on projects like beams and mantels, worm holes help add a lot of age to a piece.
Much of the wood that I use already has worm holes in it because I let the logs sit awhile outside before I mill them into lumber (sometimes even on purpose), so I have a head start, but there will still often be spots without bug holes where the wood needs a little extra love, like in the following video:
To get things started, it helps to first look at truly worm-eaten wood. There are consistencies even in what looks to be very inconsistent patterns. Here are a few principles that hold up in most wormy wood:
1.) Hole sizes vary: Even similar-sized holes are not the same. Your method for creating holes should easily produce random results.
2.) Worms tend to focus their efforts: Holes will usually have an area of focus, with more holes in the center of an infected area fading out to fewer holes.
3.) Not all holes are perpendicular to the surface: While most holes are just that – holes, many are oblong and some are more like trails.
4.) The bugs that make the worm holes often enter around defects in the wood: Soft or punky wood, spalted wood, cracks, and sapwood are all areas that will focus worm activity. Good, strong, solid heartwood is the last area to be bug infested.
5.) Small holes outnumber the big ones: Older wood that has been attacked by multiple insects will have lots of tiny holes (1/16′ diameter), some medium-sized holes (1/8″ diameter), and just a few big holes (up to 1/4″ diameter).
Here are some photos of authentic worm holes. If you can copy any these patterns you will be off to a good start.

This section of pine shows a nice array of hole sizes from large to small. Notice how the long holes follow the grain.

This section of hickory has holes that make short lines. They are also very dark and almost seem stained.

This section of maple shows a mix of holes and short trails.

The holes in this white oak are larger and have stains around them where the wood has started to decay.
Here are some of my tricks for achieving realistic results:
-

A scratch awl, normally used for marking projects, is the perfect tool for making small to medium-sized holes, after being sharpened to a long, tapered point.
Small holes. You’ll be tempted to use a drill bit for the smallest holes, but it isn’t the best choice. Tiny drill bits break easy and the size is too consistent. Plus, they pull out wood fibers that make the edge of the holes fuzzy. Instead use a nail or a scratch awl sharpened to a long fine point. A scratch awl is the best choice because it can be used without a hammer and produces speedy results. The long point will make different sized holes depending on how deep it is pushed into the wood. Push the scratch awl in the wood at different angles and different depths.
- Large holes. Use a twist drill bit for the larger holes. Be sure to drill deep enough that you can’t see the bottom of the holes and to vary the drill angle. Put the bigger holes in the softer wood. Sapwood, punky wood and areas around defects are a good place to start. Mix up the sizes in the 1/8-3/16″ range for a more natural look.
- Oblong holes. Some of the larger holes tend look like small jelly beans. Drill in fairly deep and then use the side of the drill bit to cut a short trail. The result is similar to two holes drilled right next to each other.
- Trails. Trails are often left just under the bark in bug infested logs and sometimes inside the log. Use a twist drill bit about 1/8-3/16″ in diameter and drag the bit in different lengths of crooked lines. Be sure to make some of the areas have more depth. Think of the trail as a river with shallow areas and deeper pools. Trails can have one, both or none of the ends finishing in a hole. Mix it up and have a few ends disappear into holes made with the same drill bit.

One of the most important things to remember when making worm holes or using any other techniques to age wood is to really go for it. You won’t destroy a piece of furniture by adding a few more holes or dents, and you can only miss by doing too little to the surface.
I often see furniture, especially mass-produced furniture, that will have some sort of distressing that looks like it was just phoned in. Usually, someone quickly takes a chain to the surface or pokes a few holes and calls it a day. Don’t do that. Pay attention to Mother Nature’s work and try to duplicate it. And, most importantly, have fun doing it.
What’s Going on at WunderWoods

Everyone always asks what I do. Here's the answer. Click on the photo above for a short video tour and see all of the steps it takes to go from a tree to finished furniture.